W3Counter
Skin Care And Health Tips: octobre 2015

vendredi 30 octobre 2015

How to Flatten the Bottom of Your Tummy

If you had enough of people asking you when the baby is due, maybe it is time to eliminate your lower belly pooch. That extra fat at the bottom of your tummy does not serve your appearance or your health. Flattening your belly will demand more than just doing lower abdominal exercises since these just strengthen your tummy muscles and will not affect that flabby layer of fat covering them. To eventually say goodbye to that tubby tummy, give your workout and diet routine a complete makeover.


Step 1
Modify your eating habits to avoid extra caloric intake. Substitute those morning doughnuts, afternoon treats and late-night munchies with low-calorie, healthy foods, such as vegetables and fruits, dairy, and whole grains. Decrease your portion sizes by at least 10 percent and eat monounsaturated fats (olive oil and nuts). According to Dr. Mehmet Oz, these foods fight belly fat. Dodge foods such as margarine, cookies and crackers since these include trans fats, which, according to the American Council on Exercise, initiate fat storage in your belly.

Step 2
Program at least 30 minutes of cardio exercise on 5 days of the week to burn calories. Work up a sweat, exercising at a pace that still enables you to have a discussion. Go jogging, ride a bike or run on cardio machines in the gym. For optimal caloric burn, extend your workout duration to 1 hour.

Step 3
Lift weights at least 2 times per week, targeting your shoulders, arms, legs, abdominals, hips, back and chest. Strength training excites muscle tissue, which promote your metabolism and burns more calories than fat. The Centers for Disease Control and Prevention recommends utilising a resistance that is challenging enough so that after the last repetition of each set, you can not do another repetition.

Step 4
Introduce static presses in your abdominal strengthening routine to aim the lower part of your rectus abdominis. Lie face up on the floor, lift your feet to the ceiling and bend the knees 90 degrees. Put your palms on your thighs and suck your tummy in to reduce the space between the floor and your lower back. Push your hands against your thighs for 1 second and hold the pressure with your thighs. Don't enable your hands to move your thighs. Finish 10 repetitions and 3 sets.

Step 5
Work the lower abdominals with reverse crunches. Lie on your back with the arms at the sides. Bend the knees and bring them straight over your hips. Curl the pelvis up toward the ribs so the tailbone lifts off the floor. Avoid swinging the legs and using momentum -- only utilize the lower abdominals to perform the motion. Pause 1 second before lowering the tailbone to the floor. Work your way up to making 3 sets of 20 reverse crunches.

Step 6
Stretch the hip flexors. Seldom, tight hip flexors can tilt the pelvis forward and raise the arch in the back, producing a belly pooch. Step forward with the right foot and lower down as if you are doing a lunge. Place the left knee on the floor and tighten your tush, pushing it gently forward so you feel a stretch in your hips. Extend the left arm to the ceiling and lean to the right to emphasize the stretch in the hips. Keep this position for 30 seconds and repeat it 3 times before switching legs.

mercredi 28 octobre 2015

5 Easy Skin Tightening Masks You Should Definitely Try

We start noticing numerous skin related issues as we age. The skin begins generating less oil making it saggy and dry. Who would desire to have such skin? To all avoid this, you need to begin taking enough precautions from an early age.

One answer is to opt for skin tightening masks. Below are a few simple skin tightening mask recipes which can be prepared quickly at your own home. Apply any of these face tightening masks at least once a week for youthful looking skin.


1. Egg White Mask: 

Ingredients:
Egg White

Procedure:
  1. Beat the egg and divide the egg white from the yellow. 
  2. Apply the egg white immediately on your face and wait till it dries. 
  3. Wash your  whole face with lukewarm water. 
The Egg is the most popular ingredient known for skin tightening and is frequently used by us. It firms the skin and tightens it. So if you do not have enough time to make all those recipes, you can solely use this mask and it'll do wonders to your skin.

2. Egg White And Flour Mask: 

Ingredients:
1 Egg white
Honey
Glycerin for dry skin
Flour/Fuller’s earth

Procedure:
  1. Beat an egg and divide the white from the yellow. 
  2. Mix flour, honey, and glycerin to it and apply on your face. 
  3. Wait until it dries and wash with lukewarm water. 


You can use Multanimitti or Fuller’s Earth as well. If your skin is oily, you can avoid adding glycerin if needed.

Fuller’s earth or multanimitti enhances skin tone, combats against tanning, blemishes, and pimples. It draws extra oil from your skin and stimulates blood circulation in your entire face. You can utilize flour frequently while multanimitti just occasionally when you get it from the market. One thing must be bared in mind that multanimitti is just for oily skin and not for sensitive or dry skin.

3. Egg White And Yogurt Mask: 

Ingredients:
1 Egg white
1/8tsp Sugar
1tbsp Yogurt

Procedure:
  1. Beat an egg and divide the white from the yellow. 
  2. Mix sugar and yogurt to it well and apply it on your entire face. 
  3. Wait until it dries and rinse very well with lukewarm water. 


Yogurt combats blemishes and cleanses the skin really well. Sugar is one of the best natural exfoliators. It removes,  cleanses dead cells, moisturizes and fights against early aging signs.

4. Cabbage And Rice Flour Mask:

Ingredients:
2-3 Cabbage leaves
Few drops of Almond/Olive oil
2tbsp Rice flour

Procedure:
  1. Grind and prepare a paste of cabbage leaves. 
  2. blend it well with rice flour and olive oil or almond oil.
  3. Apply it on your entire face and let it dry. 
  4. Rinse it very well with lukewarm water. 


If your skin is oily, you can let go of almond or olive oil in this pack. You can also use egg white if you like.

You might be asking about the cabbage in this pack. Cabbage leaves are best known to act against loose skin and wrinkles. olive oil or Almond oil moisturizes the skin very well.

5. Cabbage And Honey Mask: 

Ingredients:
Yogurt
Honey
Cabbage leaves
Almond/olive oil for dry skin

Procedure:

  1. Take 2-3 cabbage leaves and create a paste out of it. 
  2. blend it very well with honey and yogurt in a container. 
  3. For dry skin, olive or almond oil can be added to the paste. 
  4. Apply this mixture and leave it for 15-20 min. 
  5. Rinse thoroughly with lukewarm water. 

All these ingredients can be found simply at home. Hope this article on skin tightening face masks will help you. So let me know which mask are you aiming to start with?

samedi 24 octobre 2015

DIY Homemade Herbal Salve

If you're a big fan of herbs (like me!), then you just have to try your hand at making your own herbal salve.  It's surprisingly simple and so much fun!


The only ingredients you'll need are:

  1. herbs (I used plantain)
  2. bees wax 
  3. olive oil 
  4. small tins with lids
  5. a crock pot and a jar


This project goes together really quickly- just a few minutes of work over a period of a few days, and you're done!  

It's also a great way to give an inexpensive and creative gift!

  1. 4 oz organic plantain leaf
  2. 3 oz bees wax 
  3. 4 (.5 oz) tins and 5 (4 oz) tins
  4. olive oil 

For about $20, I ended up with 9 tins of homemade herbal salve for giving and using- not bad! 


1. The first step is to infuse your olive oil with the herbs.  To do this, pack your herbs into a canning jar (we used quart size) until the jar is three-quarters full.

2. Next, pour olive oil over the herbs until they are completely covered.  Leave about 1 inch of head space at the top, then seal with a lid.

3. Place a wash clothe in the bottom of your crock pot, and set the jar of herbs and oil on top.  Fill the crock pot almost completely with water.  Turn on "low" heat and let the herbs sit for three full days. Replace water as needed.  By the end of the three days, you will have an herbal-infused oil...

4. Like this!  Strain off the herbs and pour the oil into a clean container.  You can use cheese cloth or a clean piece of cotton (from an old t-shirt) to strain out the herbs.  (Discard herbs when you're done.)

5.  Place the herbal oil into a large sauce pan and add beeswax.  I used three 1-oz bars of wax for our salve.  Turn the burner on low heat and gently stir until the wax begins to melt.  The little things you see floating around in the oil are pieces of beeswax! 

At this point, you can also add 2 or 3 drops of grapefruit seed extract (as a natural antibiotic) and 2 or 3 drops of vitamin E oil (as a preservative) to your salve oil.   

6. If you have little helpers around, enlist them to stir!

7. Once the wax has completely melted, your "salve" is ready to pour into tins!  The oil should be smooth and completely lump-free before you pour it into your containers. 

8. Fill tins almost to the very top, then allow the salve to "set".  The tins will be very hot so be extremely careful if you try to move them before they're cool!  It only took a few minutes for our salve to cool and set.  This batch yielded five large tins and four small tins of salve.


And here is the final product- plantain herbal salve, ready to use and give!  

Plantain has wonderfully healing properties for skin irritations and rashes -- it makes a great gift for a mother with small children or babies!  I've been using it on my children's "boo boos", dry skin (including diaper rash).

vendredi 23 octobre 2015

9 Ways to Freshen Your Breath Naturally


Seems chewing gum is unhealthy and that I in person “just say no” once offered a piece (politely, of course). However some folks are afraid to quit their gum habit worrying from the monster breath. And that’s why I’m here today, to offer you nine ways in which to freshen your breath, naturally.

1. Brush those pearly whites 

Obviously one amongst the simplest ways in which to assist combat bad breath is to maintain a good hygiene. Brushing your teeth could be a no brainer, right? however the toothpaste you select will make a a huge difference. I in person don’t like most of the industrial stuff on the market for a variety of reasons. but my all natural formula, with some peppermint, spearmint or essential oils will do the trick well.

2. Floss right 

Nobody needs food stuck between their teeth… I mean, that may undoubtedly promote bad breath.however even if there aren’t noticeable chunks lodged in there, flossing will take away plaque and improve your gum health.

3. Scrape that tongue 

Your tongue isn't a smooth surface which suggests it’s a chief spot for things to cover. Brush your tongue together with your toothbrush and/or get an inexpensive tongue scraper (like this) to assist keep your mouth clean and breath fresh On to the lesser-known ways that freshen your breath.

4. Minty goodness

Grab yourself some mint leaves and chew. This natural remedy has been used for thousands of years is particularly helpful for garlic or onion breath (parsley leaves work well, too!). and in contrast to that nasty fake-food gum, swallowing the leaves after chewing can still give freshness by promoting way better digestion. Real food wins, again!


5. Baking soda to the rescue 

Need a fast, cheap, and straightforward natural breath freshener? Add a tsp. of baking soda into a cup of water. Swish some of this mixture in your mouth and “ta-da!” instant mouth wash. you can also add a drop or 2 of peppermint essential oil (like this) for an additional kick.

6. Probiotics for the win 

Since most bad breath could be a results of poor digestion, aiding your gut could be a long-run answer to bad breath. fermented foods are packed with real-food-goodness probiotics. My very personal way to aid my gut is with some whole fat (and ideally raw) yogurt.

7. Spice is nice 

Chewing on the seeds of aromatic spices will provide your mouth a lift of freshness. Seeds like clove, cardamom, and fennel have antimicrobial properties that may freshen your breath.

8. Healthy carbs 

I’m completely not a lover of restrictive diets unless there's an actual medical reason for them. And did you recognize that bad bread are often an unfortunate problem for folks on low-carb diets? As your body breaks down fats rather than carbs for energy it creates ketones. a number of these ketones are discharged in your mouth that isn't nice since they smell bad. simply one more reason to enjoy healthy carb-rich foods. (Pass me a banana, please.)

9. Lemon power 

Here’s another easy quick-fix natural cure for bad breath: Take a lemon wedge sprinkled with a bit of salt and bite down. Oh, yeah. 

Tell me. What are your “go to” remedies for freshening your breath naturally?

jeudi 22 octobre 2015

The 5 Best Homemade Skin Care Recipes

1. Banana and Oatmeal Face Mask


What It Does: Evens and brightens skin tone, soothes dry skin, exfoliates and moisturizes 
What You Need: 1 banana, 1 cup oatmeal, ¼ cup whole milk 
What to Do: Use a spoon to mash the banana into a thick paste. Place in a bowl and mix in the oatmeal and milk. Once thick, apply to your face and leave on for 15 minutes. Rinse with warm water.

2. Sugar Lip Scrub 


What It Does: Exfoliates, moisturizes, prevents chapping
What You Need: ¼ teaspoon olive oil, 1/8 teaspoon brown sugar
What to Do: Mix ingredients together in a small bowl. Apply by massaging the scrub onto lips with your index and middle finger. Rinse off excess grains with a damp washcloth.

3. Apple Cider Vinegar Toner 


What It Does: Reduces redness, treats acne
What You Need: Apple cider vinegar
What to Do: Add 2 tablespoons of vinegar to one cup of water to dilute. Apply to face with a cotton ball. If you have extra oily skin, La Bella Figura’s Victoria Fantauzzi suggests infusing with thyme sprigs; if your skin is dry and sensitive, use rose petals and lavender.

4. Milk Bath 


What It Does: Exfoliates and moisturizes
What You Need: Two cups whole milk
What to Do: Add two cups of milk while bathwater is running. Soak in tub for at least 20 minutes; scrub skin lightly with a loofah or washcloth for maximum exfoliation. Rinse thoroughly.

5. Baking Soda Hair Mask 


What It Does: Removes residue and product build-up, clarifies, adds shine and volume
What You Need: One tablespoon baking soda
What to Do: Add 2 tablespoons of baking soda to one cup of water. Stir into a paste. Apply to damp hair and leave on for 20 minutes. Shampoo out and follow with a conditioner.

10 Easy All Natural Beauty Tips


1. Banana and Egg Hair Treatment

Looking for a little more shine in your hair? Simply mix one egg and a mashed up banana. Use it as a thick paste on your whole hair and leave it on for between 10 to 30 minutes. Wash your hair doing your usual hair washing routine (if you normally use a store-bought conditioner, you will probably only need to condition the ends). And voila!

2. Moisturizing Nail Treatment

Soak your nails in olive oil for five minutes. And then sit back and admire your pretty hands.

3. Simple Honey Face Mask

Raw honey is naturally anti-bacterial and a super quick way to get soft, beautiful skin. Once a week use a tablespoon or so of raw honey (not the processed stuff parading as honey) and gently warm it by rubbing your fingertips together. Spread on your face. Leave on for 5 – 10 minutes and then use warm water to gently rinse it off and pat dry. Then bask in the glow of your honey-awesomeness.

This raw honey is awesome, by the way.

4. Apple Cider Vinegar Clarifying Shampoo

For those who are using commercial shampoos: To help eliminate any build up in your hair, mix ¼ cup organic apple cider vinegar (like this) with 1 cup water. Follow with your usual conditioner.

5. Elbow and Knee Exfoliate and Skin Brightener

Cut an orange in half and rub it on your elbows and knees. Helps soften those rough patches. And it smells good. (Rinse off the sticky mess when you are done.)

6. Gentle Body Scrub

Mix a 2 to 1 ratio of olive oil and sea salt to make a quick and effective body scrub. This helps get rid of dead skin cells creating softer, more glowing skin. And this natural beauty tip is much cheaper that expensive store bought  body scrubs.

7. Easy Deep Conditioning Hair Treatment

Want super soft, hydrated hair? Utilize melted coconut oil as a deep conditioning scalp and hair remedy. Massage coconut oil into your scalp and then work it through your hair. Leave it on for a couple of hours and then wash it out using shampoo (no need to condition unless you have really long hair and then maybe just the ends.)

Note: For you no ‘poo-ers keep in mind that coconut oil will saturate your hair with awesome goodness… that can be really hard to get out with just baking soda and *some* natural shampoos. You want to try only a little of coconut oil on a little section of hair and see if you can get it out before you do this. Otherwise, you might have really greasy (but soft!) hair for a few washes. NOT that I’m speaking from personal experience of anything (*cough*).

8. Simple Toxic-Free Shaving Cream

Apply coconut oil to your legs as a natural replacement for your shaving cream. Talk about a simple, natural beauty tip.

9. All Natural Black Head Removal

Place 4 or 5 drops of raw honey on an open lemon wedge. Then rub the lemon on your face for a minute, emphasizing any trouble areas. Leave the mixture on for 5 minutes and rinse with cold water. (Keep in mind that citrus can make your skin photosensitive so it’s best to do this before bed rather than before going outside).

10. Dry Brushing for Better Skin

Dry brushing is an easy detoxification process for your entire body. It stimulates a number of organs through a gentle massage. It also helps the lymphatic system, eliminates dead skin coatings, strengthens the immune system, can eliminate cellulite, stimulates the hormones, and can help tighten skin through better circulation. Best of all, it’s cheap and easy.

samedi 17 octobre 2015

Skin, pH and the Moisture barrier and Why it's Important

Hello again, everyone. Today we're going to talk about pH and why it's important to the skin. In my last articles I talked a bit about how you don't want to use anything that's too low or too high of a pH on the skin because of how it interferes with how the skin functions. And in this article, we're going to explain why. 

The skin's natural pH should fall somewhere between 4.5 and 5, ideally. Sometimes you'll hear before 4.5 and 5.5, but ideally you're going to be somewhere in the 4.7 range, but generally, below 5.5. Because the pH of tap-water varies from place to place and around the world, your skin's pH will fluctuate based on your environment and the products that you use and what you use after you wash your face. 

How to bring back the natural pH of the skin

This is part of the reason why we like to use toners after we cleanse, because toners are supposed to be "pH-balanced" -- this is a term that you hear sometimes -- "pH-balanced" to help restore the natural pH of the skin. pH-balanced does not mean pH-neutral, however, these toners are meant to be acidic to bring down the pH of the skin after cleansing. So when we talk about pH-balanced, we're talking about things that bring back the natural pH of the skin after you've interfered with it by applying water. What makes water more alkaline in various areas is the presence of alkaline minerals -- this is what we generally hear referred to as "hard water". So, if you live in an area with hard water, you definitely want to make sure that you're using a toner after you cleanse to help keep your skin's pH consistent. 

Moisture barrier or Lipid layer

Now, why is this important? It's important because, among other reasons, of something called the "moisture barrier" or "lipid layer". And this is a protective coating, if you will, that helps the skin to be healthy, to keep outside objects outside the body, to keep from getting infected, to keep from bacteria and any other sort of foreign invaders from entering the body. Cosmetically, it also means that the skin doesn't get dehydrated, it helps to prevent premature wrinkling and generally, it helps the skin to recover faster from any sort of injury or damage. 


To demonstrate the concept of the lipid layer, I am going to use this extremely high-tech piece of technology -- your basic kitchen sponge. Let's just go with me on this, I know it's a very loose analogy, but for the purposes of this demonstration, it works very well. So let's say that this dark blue area down here is your dermis and this light spongy area up here is your epidermis.

Now, the epidermis can absorb water and in order to hold that water in, we have something called the moisture barrier or lipid layer, which is represented by this piece of high-tech plastic right here. So the lipid layer helps to keep the water in the epidermis inside the skin so that it doesn't dehydrate. Now, what happens is that when you're using substances that interfere with the natural function of the lipid layer like apple cider vinegar or lemons or baking soda, it breaks down the integrity of the lipid layer and decreases its functions. 

So if, for example, this sponge were wet and I left it on the surface covered in plastic, it would retain water much better than it would if the plastic were not on it. Very similarly, if you did not have a lipid layer or if your lipid layer is compromised, then the water in your skin that is there naturally and is there by way of you washing your face and bathing is going to evaporate. And the problem with that, like I mentioned, is that your skin becomes vulnerable to infection, it becomes dry and uncomfortable, it's more prone to irritation and dermatitis and a number of other things. And when the skin is irritated, it is more prone to premature aging, hyperpigmentaion and acne. 

Keep the moisture barrier healthy

So just remember that the moisture barrier is part of your skin to keep it healthy, to keep it vibrant and intact and resilient and glowing and beautiful. So you don't want to mess with it too much by applying things that are too low or too high of a pH on a consistent basis. 

Skin responds best to consistent care

Now, a lot of people have asked: "Well, is it really that big of a deal, like, can I do it just once in a while?" Yes and no. I mean, you can. Some people can get away with using really, really harsh and inappropriate products every now and again, but there's just absolutely no point to it. It doesn't really matter if you do one amazing thing for your skin every year. What matters is what you do every day. So I just don't see the point. Like, why would you want to apply something like lemon juice once or twice when:
  • It doesn't make a big difference if you only do it a couple of times. 
  • If you do it consistently, it's going to damage your skin. It's going to damage the functionality of your skin fundamentally, but also, it will damage the aesthetic appeal of your skin. 

Alcohol and strong detergents

This moisture barrier is also part of the reason why you don't want to be using overly harsh products like alcohol and strong detergents on your skin, because, just like with pH, strong solvent products and harsh detergents can strip the lipid layer. This is what you hear when you hear about products that strip the oils from the skin or strip the moisture barrier from the skin and they're also a problem for that same reason. You need to keep your moisture barrier intact, so that your skin is healthy and resilient. 

So, overall, you just want to make sure that you are consistently caring for your skin using products that are appropriate for your skin's pH and gentle enough to not interfere with its natural function. I hope that gives you a better idea of how the skin functions with pH. If you have any questions let me know.  If you have any more suggestions for future articles, please do leave them in the comments. I'm keeping a running list and I will try to get through them as quickly as I can. Otherwise, I really hope that you all have a wonderful day. Thank you so much! Bye.

vendredi 16 octobre 2015

How to Reduce Blackheads and Enlarged Pores PERMANENTLY!

Hello again everyone. Today we're going to talk about blackheads and enlarged pores and what you can do at home to reduce them permanently. Make sure you stay tuned till the end of the article because I'm going to have some very easy and quick DIY clay mask recipes for the different treatments that I recommend throughout the article. 

Now, before I get started, I know that some people may not like these sorts of solutions that I have to offer because it's human nature to want a very quick and easy solution to a problem that you never have to think about again. But unfortunately, skin doesn't really work that way. Skin is not a static entity. It's constantly changing and renewing itself, so you have to care for it consistently if you want it to behave the way that you want. Just like you can't go to the gym once and expect your entire physique to change, you can't do one skin care treatment and expect your skin to change. So the things that I have to offer focus on consistent care over the long term. 

When most people talk about blackheads, they may not actually be referring to comedones (which is the technical name for blackheads), but they may also be referring to enlarged follicles (which is the technical name for pores). So when I talk about blackheads in this article - or enlarged follicles - I'm kind of referring to both because the treatment is pretty similar. 

Now, the best way to reduce follicle size and blackheads is going to depend largely on your skin type, but there are certain things that are good for all skin types in this situation, including clay masks. However, the way that you use the clay mask is going to vary, so make sure that you listen to the instructions for your specific skin type.


1. Oily Skin


We'll start with oily skin, since oily skin is most commonly associated with blackheads and enlarged follicles. Now, oily skin is prone to these problems because of its excessive oil production, but also because oily skins tend to have an above average desquamation rate - and this is just a very fancy word for the process of the skin sloughing cells off naturally - and these cells can accumulate inside the follicle and mix with sebum to give an enlarged appearance. 

This can happen with all skin types, but it is most problematic for oily skins. The solution is to try to normalize the skin through use of mild products - mild enough to not over-dry your skin or to strip the oils, but effective enough to keep your oil under control. This means using a good cleanser and toner and a light moisturizer. In addition, I recommend the use of a salicylic treatment in the form of a toner or a leave-on treatment like a gel, which can help to break up the deposits inside the follicles to help prevent excessive accumulation of skin cells and sebum. 

In addition, I do recommend the use of clay masks for oily skin; they can be extremely beneficial. My approach is a little unconventional in this area because I am a huge fan of clay masks and what they can do. So with my clients, I've had great success recommending a sort of clay mask "boot camp", where you use a clay mask every day for two weeks at the beginning of your treatment and then cut down to two to three times per week after that. Now, when I prescribe these sorts of products and treatments, I always say "as tolerated", and this means "do this so long as your skin is not showing any signs of irritation or dryness"

If I tell you to use a clay mask five to seven days per week for two weeks, but you find after four days that your skin is starting to dry out, what I mean by "as tolerated" is "cut back to a point where you can try to fulfill the prescription that I've given you while still being good to your skin". So if five days per week is too much, drop down to four. If that's too much, drop down to three, etc... 

So I recommend trying the clay mask for two entire weeks every day if you can and then cutting back to two to three times per week indefinitely until the problem has resolved itself enough for you to drop down to about once or twice a week. And always when you're using clay masks, you want to follow it immediately with moisturizer, and if it's during the day, you want to follow with sunscreen.

2. Combination Skin


For combination skin, a lot of the tips from the oily skin section will be useful, but you also may find that you need to use two sets of products for the different types of skin on your face. For example, if you have an oily T-zone, but your cheeks and chin are dry, you may find that you need two different moisturizers to suit the needs of the different areas of your face. 

What I tend to find with combination skin is that they tend to use products that are for oily skin because they want to keep their oil under control, but it's stripping too much oil from the face, creating more problems than it solves. It can create even more excessive oil production in the oily areas with excessive dryness and flakiness in the dry areas. So like with oily skin, you want to use non-irritating products, but try to find a milder cleanser instead of using an overly harsh one. What you can do instead is get a salicylic toner to use only on your oily areas and two different moisturizers to use: one on the oily area and one on the dry area.

Argan Oil


Or if you find that your dry areas are not too excessively dry, what you can do is get a very light moisturizer for your entire face and then touch up the areas that are more dry with something like argan oil. I'm a big fan of argan oil because it seems to be very well tolerated. And even with myself, when I was having some enlarged pore issues around my cheeks, I was using argan oil with a couple of other things that I'll talk about, and it didn't seem to exacerbate the problem at all. So if you don't want to buy two moisturizers, you can buy the one and use your argan oil on the areas that need it. 

I do like to recommend my two-week mask boot camp for combination skin as well, except that I only want you to apply the mask to your oily areas. So if it's only your T-zone, only apply it to your T-zone. If it's just, like, one area on your cheeks, only apply it there. And if it's random areas, just apply it wherever it needs it. Only do this "as tolerated", once again, so if your skin starts to show signs of dryness, cut back until it seems to normalize again, and always follow with moisturizer and sunscreen if it's during the day.


Salicylic Acid 


Salicylic acid is really the best thing, in my opinion, for helping to reduce excessive follicle size for oilier skin types, and one salicylic treatment that I really do like that gets great reviews is the Skin Perfecting--the Paula's Choice Skin Perfecting 2% BHA liquid. This is a salicylic toner that you can use after cleansing and as a spot treatment, and it seems to be very well tolerated and doing very well with a lot of people that I've recommended it to. It's too drying for me, so I don't use it that way, but I do like to keep it on hand for other reasons, including keratosis pilaris treatment. 

But for oilier skin types, having something like this around is definitely a very good idea. Even if your skin starts to normalize, having this around means that if you have a little bit of excess oil--like, for women, our oil levels tend to fluctuate with our hormonal levels--it's good to have something like this on hand so that if you do start to have that problem, you can start to treat it right away.


3. Dry skins


Now, for dry skins, it's a little more complicated because salicylic can be a little too drying, which is why I don't use those on my face because I have extremely dry skin. Since blackheads and enlarged follicles on dry skin are not necessarily connected to excessive oil production, using oil-reducing treatments is not going to be the most effective thing. 

What I've found is the most effective is the consistent use of mild leave-on exfoliating treatments like AHAs and mild retinols. Two products that I've been enjoying are again from Paula's Choice (and I swear this is not sponsored; I just really love their products): this is the Paula's Choice Daily Smoothing treatment with five percent alpha hydroxy acid, and this is one that I've been trying recently called the Resist Intensive Wrinkle Repair retinol serum.

Very Mild Retinol Product


I did use this for about six months before I started using this one. This is a really great one, but right now I'm really loving this one. Now, this is a very mild retinol product, and I tend to be more on the conservative side when it comes to recommending retinols, especially for people under 30, because it can have the unintended side effects of inflammation and increased sun damage. I always say that you don't want to create new problems when you're treating a problem, so my approach, especially when it comes to pharmaceuticals and very strong retinol products, is a bit more conservative than average. 

So you take that for what it's worth, and you can make up your own mind about it. But like I said, this a very mild retinol; this is nowhere near the strength of something like a Retin-A or a Differin, and I definitely don't recommend using those for anything except the most extreme cases for people under 30. For people over 30, if you're talking about anti-aging, it's a bit of a different conversation, but we'll get into that another time. 

I should also note that retinols can cause some pretty dramatic redness and peeling in dryer skin types, which is why I personally haven't been using them consistently until now. Like I said, this is a very mild one, and I haven't had any of those sorts of undesirable side effects with this one, so so far, I'm really loving it.


Cleansing Brushes


The other tip that I have for reducing follicle size in dry skin involves very efficient cleansing, and this is why I love cleansing brushes so much, including the Clarisonic. Now, you don't have to buy a Clarisonic. I do think this is the best one on the market. However, you can still get the same benefit from a manual cleansing brush, which usually runs around five dollars. What's so great about them is that they're so efficient at cleansing that you can switch to a much milder cleanser than you're used to. 

So like me, for example, I used to use much stronger cleansers (like foaming cleansers) because my face--while it isn't particularly acne-prone, or it didn't used to be very sensitive - it would get little irritation-type breakouts if I didn't clean very, very well. So I would use cleansers that were not entirely appropriate for my dry skin type. But when I switched to using a Clarisonic (which I've been using for about three years now), I could - for the first time in my life--use cream cleansers, which are appropriate for very dry skin. 

Now, like I said, I do think the Clarisonic is the best one on the market, but it is pretty expensive. So if you can't afford it or if you don't want to spend the money on it, you can get some of the same benefit from using a less-expensive cleansing brush. But this is very good for all skin types, not just dry skin. 

If you are normal skin, if you're combination skin or oily skin, cleansing brushes are a really great tool because they do make the most of the cleanser that you're using. So to wrap up dry skin, just remember to use mild, unscented products, make sure you're using sunscreen, and you can use clay masks as tolerated. I don't necessarily recommend that you do the two-week-in-a-row clay mask, but you can use them a couple of times a week as tolerated depending on the recipe that you use. 

Before I move on to some very easy DIY mask recipes, I just want to say thank you to everyone who has been sharing my articles recently. It really does mean a lot. It does help me out very much. So if you've liked anything that I've had to say or if anything's been useful, I'd really appreciate it if you would share this article: put it on Facebook or Tumblr or Twitter, just any way that you can to just help get my articles out there.


4. Clay Mask Recipes


One of the easiest clay mask recipes is just to get some kaolin or bentonite clay - just pure clay, nothing else added to it - and mix in a little bit of your unscented and alcohol-free toner. Mix them together until you get a fine paste, and then apply that for five to ten minutes, only until it starts to dry. You don't want it to get uncomfortable. You don't want it to dry completely. If it starts to feel at all uncomfortable, that's when you rinse it off. There is no benefit to leaving it on your face so long that it starts to feel uncomfortable, and remember that discomfort equals inflammation and irritation, and that is bad. 

I talked about honey in my 'DIY Ingredients to Try' article, about how it's a great humectant and has great antibacterial and antiseptic properties--and anti-inflammatory properties, which are always great--so if you're feeling a little adventurous, you can add a bit of honey to your mask. I always recommend raw honey or manuka honey if you can get it, but if not, a little bit of regular honey will work too. Just remember that raw honey is much, much better.

For dry skins


You can benefit from clay masks as well. Just remember that you don't want to be over-drying your skin, so find a toner that is very, very hydrating and moisturizing, something that is mild enough to use around the eyes, and I love this Resist Advanced Replenishing toner. This is absolutely my favorite product from Paula's Choice. If I don't use it, my skin is just a mess. I really notice a huge, huge difference if I run out of it. But any toner that you find that you like, that works really well for you and is very hydrating, you can mix in a little bit of the clay. 

You definitely don't want to mix in as much as the oilier skin types are using, but you can still get the same benefit. So just mix in less of the clay and make it more of a liquidy consistency instead of a thick paste. Also, if you want to thicken it up, you can add some oats to it. Oats are really great for dry skin as well. And the honey, which is a humectant. Alright, that's pretty much all I have to say about it right now. I know that's a lot to throw at you guys, but I think there's some really good information in there that everyone can use.

Conclusion


Remember that the secret to good skin care is consistency. So like I said, it doesn't matter if you do one amazing thing for your skin every year. What matters is what you do every day. So the things that I've talked about here are really designed to help you get in a routine of caring for your skin that will give you the results that you want. In this case, that means reducing the appearance of follicles and blackheads and preventing more from forming. 

If you have any more questions that I haven't answered, please do leave them below. Hope you have a wonderful day, and I will see you soon. Bye!

mardi 13 octobre 2015

DIY Skin care recipes and ingredients you SHOULD try!

Hello again everyone! This is going to be my ''DIY recipes to try'' Article. And by recipes I mean, you know, recipes, actual recipes, and ingredients that you may have seen around the internet, on Youtube, on blogs, etc.. Sometimes even magazines have these. The response to my last article, the DIY recipes not to try, was so overwhelmingly positive, I got really excited to make this one, so let's jump right into it.


1. Honey

The first thing I want to talk about is probably the most common thing that everyone asked about in the comments, and that is honey. Honey is awesome for the skin: completely, totally, fabulously awesome in so many ways. Raw honey is always going to be better than processed honey but even processed honey does have its benefits. If you can get ahold of raw honey, definitely go for it. It makes a huge difference.


But let's talk about what honey does for the skin for a sec. Honey is a humectant, which means it draws moisture into the skin. It has antiseptic qualities, which means you can put it over acne, you can put it even over wounds. Like, my sister's boyfriend had an accident with his hand. He had a giant cut on his hand that started to get infected. He put some raw honey on it and the swelling went down, the pain went down. It was kind of amazing. So honey is definitely a miracle product.

Another type of honey that's really wonderful is called Manuka honey (that is spelled m-a-n-u-k-a) and Manuka honey is great for so many reasons. It has the same sorts of qualities that raw honey does, but it's also really great for digestion, for stomach pains, indigestion, ulcer pain, helps with ulcers in general. It's just really a wonderful product. So if you have acne, if you have dry skin, if you have normal skin and you just want to keep it that way: doesn't matter. Honey is a great ingredient. All of you who are asking about honey: it's absolutely wonderful; you should not worry about it at all. Just try to get raw honey or Manuka honey if you can.


2. The Oil Cleansing Method

The next thing I want to talk about is something called the oil cleansing method. This is gaining a lot of popularity around Youtube and around the blogosphere, as it's called. And basically, it's various types of recipes of different oils combined to use as a cleanser. And I'm sure all of you have heard of different types of cleansing oils, premade cleansing oils, like the Mac Cleanse off oil, or the Shu Uemura oil, Laura Mercier has an oil, and they're getting very popular.

But the benefit to making your own cleansing oil is that you have complete control over what goes into it, so you're not going to get any fillers, you're not going to get any essential oils, fragrances that you don't want in there. Because remember, you do not want fragrance in your skincare products. When you make your own cleansing oil, you can choose from a wide variety of different oils that have different beneficial properties for the skin. I'm working on different recipes, like, if you Google oil cleansing method there are lots and lots of recipes out there, but I personally don't have a list in front of me, so we'll get into that another time.

But if oil cleansing is something that appeals to you, that you've been wanting to try, absolutely look it up. There are like I said, a lot of different oils that are good for different skin types, even oily skin can find some oils that are beneficial. With that, you want to be careful that you're using oils that are appropriate for your skin, because like I said in the last article, certain oils like coconut oil and olive oil are not going to be so good for oily skin or skin that is prone to comedogenic breakouts. So just do a little bit of research and make sure that you're choosing your oils wisely.

3. Fruit Masks

The next thing I want to talk about is fruit masks. Now, there are a lot of different fruits, there are a lot of different recipes for fruit masks. It really doesn't matter what specific recipe you're using, all that matters is that you know if the ingredients in the mask are good for you. I can happily say that there are many, many fruits that have wonderful properties and very beneficial actions on the skin. So, fruits like bananas, any kind of berry is going to be good.


With berries you've got to watch your pH, I'm going to talk about that a little bit later. But, like I said with the lemons, you don't want to use anything that's too low or too high of a pH, because you don't want to throw off your skin's natural pH. But berries are great, cucumbers are great (cucumber's also a fruit), tomatoes are good for oily skin, but again you want to watch the pH. Avocados are also a fruit, and they are great for the skin. Basically, you're just going to want to choose non-citrus fruits, so nothing that has too low of a pH.

And also, you want to avoid using straight pineapple on the skin, even though pineapple does have a really wonderful enzyme that has a nice effect on the skin, you don't want to use straight pineapple itself, because that is just a bit too harsh. You can get the enzyme, which is called bromelain, on its own and use that in masks, but I don't really recommend putting straight pineapple on the skin.

Just like fruits, vegetables have some great properties for the skin as well, so you can feel free to throw some vegetables into your homemade face masks, just as long as you're keeping pH in mind. Generally with vegetable's pH isn't as much of a concern as it is with fruit, but you still want to keep it in mind when you're mixing things at home.

4. Oatmeal

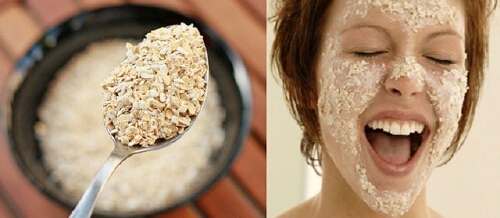
Let's talk about oatmeal. Oatmeal is another very popular one that came up in the comments. And yes, oats are really great for the skin. You just want to watch out for one thing, though: if you have any signs of gluten intolerance, you want to be very careful what kind of oats you use because of the possibility of cross contamination.

And I've talked about this at length before, so I'm not going to get into it too much now, but food intolerances and food allergies have a very strong impact on the skin, so you just want to make sure you know very definitively that what you're putting on your skin is not going to cause a systemic reaction or any sort of inflammatory reaction. So, if you're going to use oats just make sure you're not gluten intolerant. If you are, make sure you're using certified gluten free oats.


But otherwise, oats are really great. They have really great properties for the skin. And there are a lot of really, really overpriced oat masks that are like a little bit of oats and a lot of other crap. But, you know, there's really no reason to have to buy these sorts of pre-made masks that are supposed to be like "fresh masks", like the kinds that Lush makes basically, because you can take these ingredients, put them in a blender, and voila, there you go, you have yourself a fresh face mask. So you can take bananas, oat, and glycerin, and a little bit of clay maybe, and some honey, and that's a great mask right there.

5. Glycerin

I mentioned glycerin. Glycerin is a great ingredient, you can buy it at the drugstore, it's going to be I think in the skin care section. It depends on where you go, but if you can't find it ask someone who works there, they can help you find it. It's very cheap, and it's a wonderful humectant, and just a really great thing to have on hand for a lot of reasons. I use it in my nail polish remover, and you'll find that it's an ingredient in a lot of DIY masks.


6. Aspirin

Another ingredient people asked about a lot was aspirin, and aspirin is also something that's a good thing to try. Especially if you have acne, I've heard that people have really wonderful results with aspirin masks. If you're going to be doing aspirin masks, just keep your pH in mind. Like I said, pH is important, and I'm going to talk about that in the future. But don't mix straight apple cider vinegar into it, don't mix lemon juice into it, mix it with a bit of water. If you want to add a teaspoon of apple cider vinegar or something like that, then that's perfectly fine.


I don't really recommend lemon juice like I said in the past article I don't ever really recommend putting lemons or lemon juice on the skin. Same goes for limes and oranges and all that. But there are great benefits to using aspirin as a skin care treatment, so that is perfectly fine.

7. Egg Mask

Another one that is perfectly safe to use most of the time is an egg mask, or using eggs in your masks. Egg whites have a sort of toning, tightening property, and they can be good for oilier complexions. Assuming that you're allergic to eggs, which I am, so I don't use them. But if you tolerate eggs perfectly well, then you can mix them into your face masks. If you do have oilier skin, a quick egg white mask is a good way to tighten the pores temporarily and reduce a bit of oiliness.


8. Almond milk, Coconut Milk, and Soy Milk

If you're looking for a base for your DIY mask almond milk and coconut milk are great bases. They are very rich in oils and they have great properties for the skin. Almond milk is what I personally use, because like I said millions of times, I'm allergic to pretty much everything, which includes coconut. So I don't use coconut oil or coconut milk. But almond milk is a great carrier if you don't want to use regular milk, which is also fine if you tolerate dairy products. Any sort of milk is fine, as long as you don't have any sort of dietary contraindications, you can use whatever kind of milk base you want.

The only caveat is that I'm not a big fan of soy products. I think you really need to be careful when you're getting into soy. On the skin, it's less of an issue but in general, I don't really recommend soy. I don't think it's some miracle ingredient, and it's definitely lowest on my list of milk bases and plant ingredients. I'm not a big fan of soy. It's not necessarily the worst thing you could be putting on your skin; I'd much rather you be putting soymilk on your face than alcohol obviously. But because of what I know about nutrition and soy's effect on the body, it's not something that I would personally want to use all the time. I will leave that for you to decide, though, that's just my little take on it.

9. Coconut Oil and Olive Oil

I did talk about coconut oil and olive oil as makeup removers in my last video, with the caution that if you do have skin that is prone to comedogenic reactions, you probably don't want to be using those on your face. However, if you do not have comedogenic reactions, they are perfectly safe to use on the face as a makeup remover.

I do not recommend that you use them as a primary moisturizer because they are not the best tolerated in the skin. However, if you are just using them to take off your makeup and then using your cleanser over that, I think they're perfectly fine so long as you know you're not prone to comedogenic breakouts.

10. Body scrubs

I'm a big fan of home chemistry in general. I think that, you know, you can make your own lip balms. If you're into body scrubs, you can make your own body scrubs. Making a body scrub is probably the easiest thing in the world. The only thing I don't recommend is using a really coarse grained salt or sugar.

You want to get something that's on the finer side because I talked about crystalline substances in the last article, how they can create tiny lacerations in the skin and that can be irritating. On the body, the body skin is a bit more resilient so it's not as much of a problem as the face, but I definitely would avoid using coarse Epsom salts or coarse rock type salts. Use salts and sugars that are going to be smaller grained and less abrasive.

As for what oils to mix in, you can pretty much use any oil you want. It really does not matter that much. As long as you are not having a reaction to it, there are so many wonderful carrier oils. When I'm talking about oils, I'm talking about carrier oils and emollient oils, not fragrant oils. 

We're not talking about essential oils or any sort of perfumes. Those are never advised, pretty much ever. But anything like your grape seed oils, your olive oils, your coconut oils, your shea butter, your jojoba oils, any of these oils is great for any sort of DIY project.

11. Jojoba Beads

Something else I mentioned in the last article is jojoba beads. And these are just little beads of wax that you can add into cleansers, body wash, anything to make a scrub. If you don't want to use something like a coarse salt scrub or sugar scrub, you can definitely get a bag of jojoba beads, they're pretty cheap. You can buy them in bulk from various online retailers. Pretty much any sort of DIY skincare type site should have them, but just do a google search for it.

But jojoba beads are great because they come in different sizes, they are gentle because they're spherical and they're just a wax. But also they are much, much better for the environment, because they're a natural wax, they are biodegradable and much better than the plastic beads that you're getting in your store bought scrubs, body scrubs, etc..

You may have heard a little bit about it on the news recently, these plastic pellets from scrubs are getting to be a real problem. So if you can avoid using them, I would absolutely encourage you to do so.


So those are all the recipes I can think of right now. If I didn't mention something that you've heard about it, it may have been in my last article, or it's just something that I haven't heard of, or it's something that I've forgotten. So feel free to leave more recipes in the comments below, and I will keep a list of anything that I didn't mention and try to talk about it in a future article. If you like these recipes, if you like what I have to say, if I've helped you in any way, I would really, really appreciate it if you would share my articles with your friends. Thank you guys so much, and I will talk to you again very soon. Bye!

lundi 12 octobre 2015

My NATURAL Skincare Routine + How I CLEARED MY SKIN!

Hi guys, how is it going? Okay!! Today's article is very exciting cause I finally found a skin care routine that works for my skin type and I'm so freaking excited because it has helped clear my skin. 100 percent I feel like I have a brand new face so if you have been reading my articles for a while then you would know that I've been trying to keep my beauty products natural and cruelty-free. 

I was doing a ton of research online on natural and cruelty-free products and I came across this one: The OSEA (Pure, Vegan, Organic Skin Care From the Sea - Natural Seaweed Beauty Products since 1996) This just happen to be vegan and gluten-free if you're into that sort of thing. These products are also free of all the crap that a lot of companies put into their product like GMOs, parabens, sulfate all that stuff. And everything is made with USDA certified organic seaweed. 

How fancy!! ''Wow'' So I would just like to say I've never been so obsessed with a skin care line before and I kind of want to show you guys my skin care routine if you will. ''Yeah'' let's get started, shall we?

So the first thing I do is remove makeup using coconut oil. It's very soothing in my eyes and I find I don't have to like scrub down because scrubbing causes premature wrinkles. Look it up ;)

1. Ocean cleanser

Then after that to cleanse my skin I use the Osea ocean cleanser. This works incredibly for my specific skin type. I would say I'm like normal to oily combo skin. It is very soothing, very rejuvenating and it really wakes my skin up and it makes it feel incredible after I use it. You are also able to use it as a makeup remover for your eyes as well. And it's not going to hurt them. Don't you hate when you have a makeup remover specifically for your eyes? Yet it still hurts the crap out of them like why do companies do that.


2. Sea Mineral Facial Spray

After that, I follow up with the sea mineral facial spray. It is actually a toner that you're able to just spray all over your face. This spray is very refreshing. I actually like to use this kind of throughout my day. This is very soothing and I just really like it. It also helps to reduce redness which is incredible because I have a very pale skin as you know. So when I have a breakout it's very noticeable and my pimples tend to get really red. The sea mineral facial spray also helps with that. This is also incredible if you have a sunburn because it has Aloe Vera in it. So that's going to really help with that and you won't look like a lobster anymore. 


3. Atmosphere Protection Cream

Next, I really like to use two products kinda like combined. ''Mmmm'' They are two moisturizers. Actually I don't know which one to talk about first. Okay! Let's go with this one. This is the atmosphere protection cream. It is absolutely phenomenal to use right underneath your make-up. It really helps to fade away any fine lines or wrinkles. Atmosphere protection cream is absolutely incredible and it's kinda magical. I think that there's magic in this. Honestly!!


4. Ocean Cleansing Mudd

Then on top of that I actually like to layer the Ocean Cleansing Mudd. This is obviously for your acne. I do get an occasional breakout here and there. And now that I'm saying that. I haven't had a huge breakout since I've been using this skin care line. It kinda proves that going natural is the way to go if you have acne.


5. Essential Corrective Complex

For the occasional Zit that appears on my face. I like to use the essential corrective complex. It is a spot treatment and it has one of those rollerballs on the end of it which is really convenient. So you can just kinda roll it onto your acne and it's going to help it fade away. ''Oh my gosh'' One day I woke up and I had a Zit right in the middle of my forehead. And I had to film something really important the next day. I was like why are you doing this to me ''life''. So I actually put this on right after I discovered that it was like exploding onto my face. And not even kidding you, in the next day it had reduced in size by like probably seventy-five percent. I was like this is literally a miracle product. It's so cool and it smells so good too. It smells like lemony goodness.


6. Red Algae Mask

So that was kind of my daily regimen. I guess you could say. And then about once to twice a week, I actually do also want to use the red algae mask. It helped to really purify my skin. Literally all I do is I put this all over my face for about 10 minutes or so maybe 15. Sometimes, I accidentally leave masks on for longer because I just forget that they're on my face. So on those days that I really wanna like pamper myself I'd really like to use this. I'm going to the bath or I'm getting some work done or something. Then I just take it all off and my skin is so rejuvenated and ''yeah'' I love it so much. And of course, it smells incredible like everything else that I showed you.


I would also like to say that the packaging is glass. It's like really super fancy. I feel like I shouldn't own this cause I'm not that fancy ever person. so I urge you to try Osea Malibu if you're looking to go the more the natural route. I really hope that you guys want to try this stuff because no joke I would not come on here if I didn't 100 percent wholeheartedly believe in something and I am thoroughly obsessed with.